
Main Game Buttons


Main Game Buttons are positioned along the bottom/left & right of the screen.
From left to right: Save button, Gymnast Editor button, Camera Control button, UnSticker button, Gear Panel button & Gym Bag button.

The Stop Button is positioned below the The Text Map.
Use the Stop Button, to instantly stop the Conditioning program at any time.
NOTE: When the Stop Button is used, the game is automatically saved!
WARNING: The Stop function does NOT use a confirmation dialogue; meaning any running functions are immediately cancelled!
The Text Map
Know Where You Are!
The Text Map is positioned below the Main Effects Bar & above the Stop Conditioning button. Use The Text Map to keep track of your characters' current location .

NOTE: The Text Map is automatically updated, as characters move between different game zones or locations.
The Skill Bar
.jpg)
The Skill Bar is positioned along the bottom/center of the screen.
The Skill Bar is automatically hidden, when the Conditioning Station is started or during Combat. Use the Skill Bar button (left side of the Skill Bar) to manually show/hide the Skill Bar. Use the UI Toggle button (right side of the Skill Bar), to toggle the User Interface between Function (F) and Information (I).
Thumb Pads

Thumb Pads are mostly positioned along the left & right side of the screen.
When added to the Gym Bag or Skill Bar, many items are automatically displayed as handy Thumb Pads, for easy access to key item functions, when the holographic simulation is running. When more than one item shares the same Skill Bar slot, Thumb Pad icon/function is automatically updated, when items are switched out on the Skill Bar.
NOTES:
• Thumb Pads are ONLY available, when the station's Conditioning program is running!
• Use the Item Swap button (when available) to monitor items in the Gym Bag sharing the same slot and to automatically swap existing item for another item sharing the same slot!
Effects Bars

Main Effects Bar is positioned along the top/center of the screen.
Combat Effects Bar is positioned below the Mini-Display.
Any active (usually temporary) effects on your characters will appear on the either the Main Effects Bar or on the Combat Effects Bar.
NOTE: Combat Effects Bar is only active, when Fighting or Exorcising!
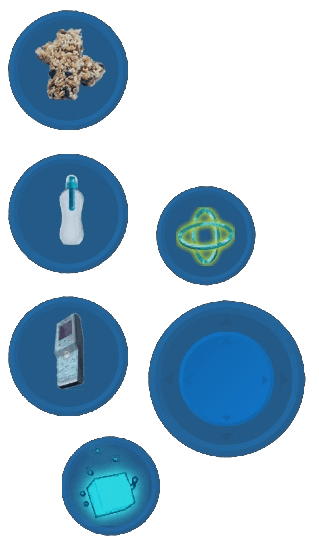
Gym Bag
.jpg)
- Use the Gym Bag button, to open/close the Gym Bag.
- Use the Close button (top/right), as another way to close the Gym Bag.
- Use the Reorganizer button (top/left), to automatically move Items into new slots, in order to fill in empty slots in the Gym Bag.
- Use the Bag & Account buttons (bottom), to toggle between Gym Bag display & Gymnast Account display.
- Use the Account display, to display the amounts you have for all game currencies.
- Use the numbered tabs (left), to switch between different "Pockets" in the Gym Bag.
- The Gym Bag starts with 4 Pockets, but can have up to 10 Pockets.
- Purchase PocketAdder, to add up to 10 Pockets to your Gym Bag.
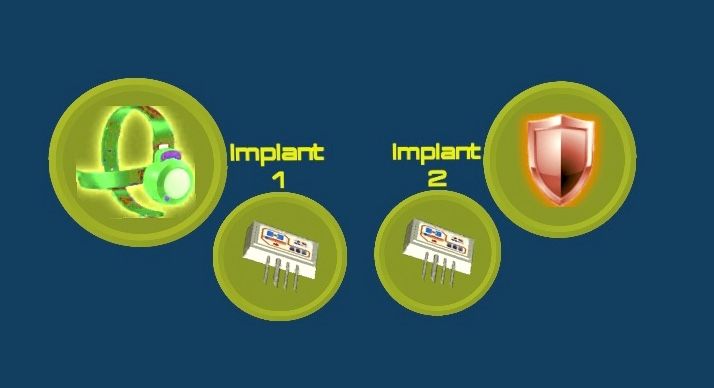
Gear Panel
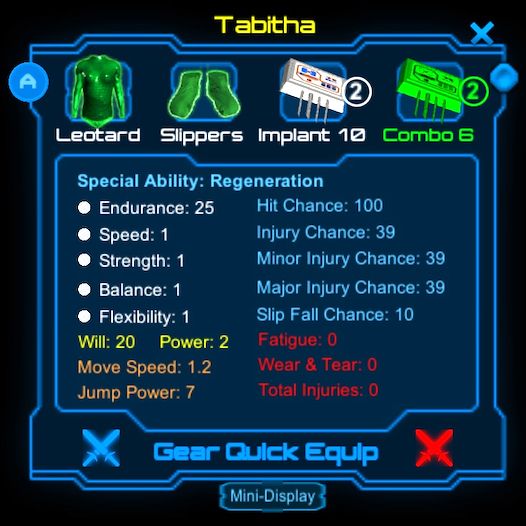
- Use the Gear Panel button, to open/close the Gear Panel.
- Use the Close button (top/right), as another way to close the Gear Panel.
- Use the A (top/left) button, to open the Achievements Panel.
- Use the 4 Gear Panel Slots to equip Gear Items.
- Use the Implant List button (top/left) to see a list of Implants currently in the Gym Bag.
- Touch Implants in the Implant List Window to automatically equip or switch out Implants.
- Monitor key information about your character from the Character Details display (window center).
- Use the Mini-Display button (bottom/center) to automatically close the Gear Panel and open the Gear Panel's Mini-Display.
- Use the Gear Quick Equip buttons (bottom/left & right) to automatically equip Basic Player Gear (which includes PsiBlaster & Defender) or to automatically equip Basic Exorcism Gear.
Mini-Display
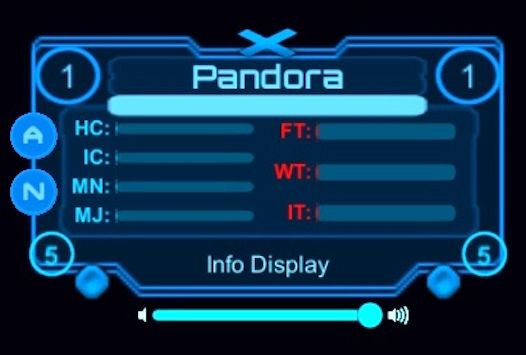
- The Gear Panel's Mini-Display is automatically enabled, when the Conditioning program is started.
- Use the Close button (top/center) to close the Mini-Display.
- When the Gear Panel is opened, the Mini-Display is automatically closed.
- When the Gear Panel is closed, while the Conditioning program is running, the Mini-Display is automatically opened (unless character is at Prophet's Satellite).
- Many of the functions of the Gear Panel are duplicated in the Mini-Display. However, the Mini-Display provides access to additional functions and information (eg - Notepad (N) button (if available), Information Display & Game Volume Control).
Vendors
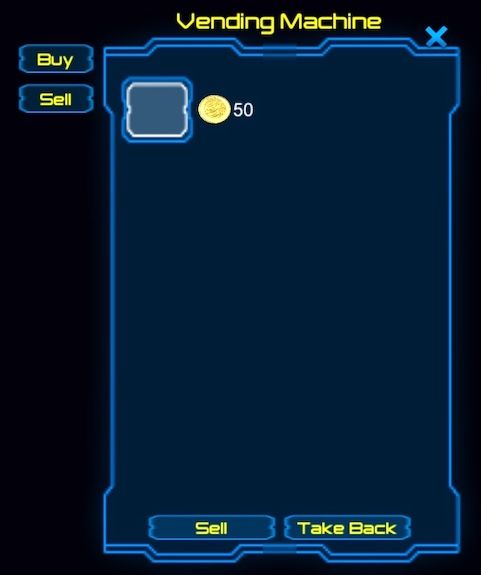
- Most Gravity Goddess Game Items that can be purchased are purchased from Vending Machines. But there are 2 NPC Vendors in Holo-Station I: Prophet (Mount Upgrades) & the Smuggler Bot (Smuggled Items).
- Holo-Station I Vending Machines (3): Player Gear, Key Consumables, Special Items.
- Prophet's Satellite Vending Machines (2): Common Items, Rare Items.
- Black Market Vending Machines (4): The Red Vendor, The Yellow Vendor, The Green Vendor, The Blue Vendor.
- The Abandoned Mining Station Vending Machine (1): Rare Consumables
- PowerCell Vending Machines (PowerCell Vendor): Prophet's Satellite (1), The Abandoned Mining Station (4).
- Companion Vending Machines (Pet Upgrades): The Black Market (4).
Lockers
.jpg)
- Purchase a 24 slot Mobile Locker, to help with Item storage, organization and management.
- When Olympus is unlocked, players also have access to two more 24 slot Lockers, in the Girl's Locker Room, located at the back of the Olympus Gymnasium.
Movement UI

Use the Movement User Interface (Joystick & Jump button) for Character Turning, Walking/Running and Jumping.
Use the AutoMove button (below Jump button), to enable/disable Character Automatic Forward Movement.
Use the Movement Speed button (below AutoMove button), to toggle between Auto-Walk and Auto-Run.
Character Auto-Run Speed
When the Movement Speed button is touched, to enable Auto-Run, two Run Speed buttons are displayed below the Movement Speed button. Character Auto-Run Speed is also displayed on the AutoMove button, when Auto-Run is enabled.
Use Run Speed buttons to increase or decrease Character Auto-Run Speed.
Character Auto-Run Speed can be increased to a maximum speed of 1.0 PLUS any speed benefit from Slippers.
Character Auto-Run Speed can be decreased to a minimum speed of 0.5 (default Auto-Walk Speed).


Mount UI
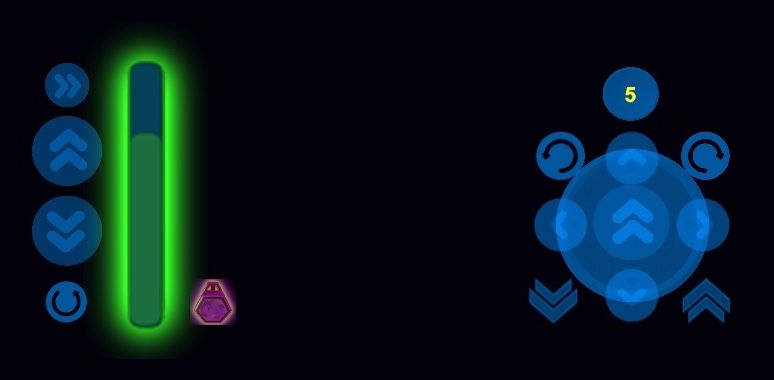
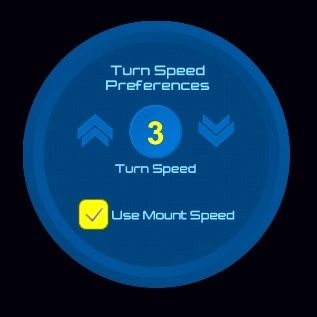
Use the Mount User Interface, to control the Platform Mount, when the Gymnast is mounted.The Mount User Interface allows the Platform Mount to move in 6 directions (forward, backward, right, left, up & down).The Mount User Interface also allows the Platform Mount to turn 360 degrees, to the right & left.The Mount User Interface is also used, to control Mount Movement Speed & Mount Turn Speed.By default, Mount Movement Speed is separate from Mount Turn Speed. But Turn Speed can be configured, by the player, to automatically match Movement Speed.Use the Turn Prefs button to open/close the Turn Preferences Panel.Use the Turn Preferences Panel to configure Mount Turn Speed.Use the PowerCell Bar to monitor Mount Power Level and Power Optimization.If at least 1 Optimizer is in the Gym Bag, the Optimizer button is enabled in the Mount User Interface.Use the Optimizer button, to optimize fuel consumption.
NOTES:
• In the Gravity Goddess Game Series, characters are able to move independently, even when mounted! • The Mount Controller is also used to control character movement, when the character is Levitating! • The Mount Controller is also used to control object movement, when the character is using Telekinesis! • The Mount Controller is also used to control cargo movement, when the character is using Anti-Gravity to load cargo! • Character has to have at least 1 PowerCell in the GymBag, in order to use Mount functions, including Mount Upgrade functions. • When the Mount runs out of power, the Mount's engine is automatically shut down.
Fight UI
The Fight User Interface provides easy access to main Fight Gear functions, while Fighting.
Click here, to learn more about Fighting, in the Gravity Goddess Game Series.
Exorcism UI
The Exorcism User Interface provides easy access to main Exorcist Gear functions, while Exorcising.
Click here, to learn more about Exorcism, in the Gravity Goddess Game Series.
Download the FREE Path to Power app, to learn more about the Gravity Goddess User Interface!
© Copyright 2023 Register.com. All rights reserved. All registered trademarks herein are the property of their respective owners.